
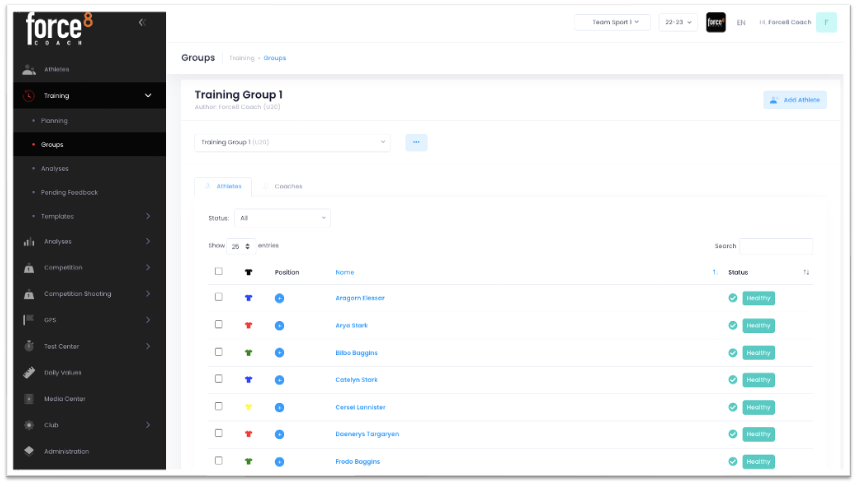
Under TRAINING – GROUPS you can create groups, add athletes/coaches to the group and customize jersey color and positions.
Add group
To create the first group, click the “Please add a new group” button at the top center. If you have already created groups, click on the “···” button and then on “Add New“. Enter a name for the group and select the appropriate age group if needed. Then click on “Save“.
You are now in this group.
Add athletes to the group
When you are in the “Athletes” tab, click on “Add Athlete” in the upper right corner. In the window that appears, check the boxes to the left of the athlete names you want to add to the group. You can search by athlete name in the search field or filter by status or year to find your athletes faster. Then click on “Add“.
Add coaches to the group
Switch to the “Coaches” tab. Click on “Add coach” in the upper right corner. In the window that appears, check the boxes to the left of the coach names you want to add to the group. Then click on “Add“.
Assign positions to athletes
Click on the “+” in the “Position” column next to the athlete name. Select the desired position in the drop-down menu of the window that appears and click on “Save“.
To edit or remove the position of an athlete you can click on the “Position” and in the appeared window either change the position and click on “Save” or if you want to remove the position click on “Remove“.
Assign color to athletes
Click on the “Jersey icon” next to the athlete’s name. In the window that appears, click on the “light gray square” and select the desired color. Then click on “Save“.
If you want to assign the same color to more than one athlete, check the corresponding checkboxes and click on the “pencil icon” at the bottom. In the window that appears, click on the “light gray square” and select the desired color. Then click on “Save“.
To edit or remove a color, you can click on the corresponding “jersey icon“. In the window that appears, click on the “color square” and select either a new color or the square with the “x” to remove the color. Then click on “Save“.
Edit/Delete Group
Select the desired group and click on the “···” button. Click on “Edit” to change the name or age group. Click on “Delete” to delete this group.
Remove athletes/coaches from the group
Select the desired group and the tab “Athletes“. Check the boxes on the far left of the athletes’ names you want to remove. Click the “Unassign Athletes” button that appears above the names.
To remove coaches from the group, follow the same procedure, but switch to the “Coaches” tab.